


When it comes to nailing the perfect makeup look, there has always been one step that either makes or breaks the entire face of makeup. The dreaded, but beautiful winged eyeliner.
Although a tedious task, when the wing is mastered it makes for a stunning beauty look that’s flattering on almost everyone. Whether it be a subtle everyday wing or a full-glam flick, mastering the wing is definitely something you should add to your beauty bucket list.
So, here are some tips & tricks to calm your nerves and nail the perfect wing.
Tip 1: Your environment
No one likes working under pressure, so when it comes to eyeliner, a calm workspace is your best friend. Sit down and make sure you have a flat surface to rest your eyelining elbow on for stability. Make sure you have a small mirror handy that you can move around and look down into easily.
Tip 2: The eyeliner
A question I’ve pondered for years has been, which type of eyeliner is the easiest one to pull off a wing with—liquid, pot set, or a felt tip pen?
For entry level eye-lining (and people with shaky hands like myself), a felt tip eyeliner pen is the best option to draw your wing on with. It’s easier to control, and the tapered ending is practically already in the shape of an ideal wing, so using its shape as a stamp on your eye works as the perfect guide.
Try: Nars Eyeliner Stylo
Here’s how to apply the perfect eyeliner
Step 1:
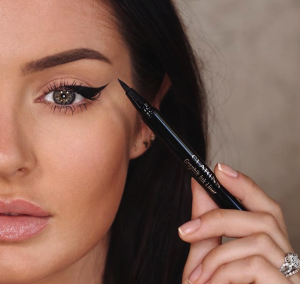
Working with one eye at a time, rest your elbow on your surface and look down into the mirror. Start in the middle of the eyelid and work your way outwards. Hold the felt tip flat against the eye and stamp it onto the middle of the eye and then begin to roll the pen so that the finest point is now drawing the wing on. Press the eyeliner into the lash line so there are no gaps and the colour is totally opaque.
Step 2:
When you get to the wing, draw a faint dot in the position where you want the wing to end as a guideline to follow. It’s important to keep your eye open while you map out your wing so it doesn’t fold into your eyelid crease once you open your eyes— the wing should look seamless when your eye is open and closed.
Begin to fill in the wing from the marked dot and keep opening and closing your eye after each step to ensure the wing is smooth.
Step 3:
With a precise concealer brush, tidy up the wing and make the point of the wing as sharp as possible. Once the shape is perfect, draw over it again to make sure it’s totally opaque.
The eyeliner should taper into the inner corner of your eye seamlessly so you can’t really see where the eyeliner ends and begins.
Step 4:
Take a deep breath and repeat on your other eye. As long as you have a concealer brush, you’ll more than likely be able to even out any mistakes and make the wings as even as possible.
Step 5:
Finish off the eyes with a coat of mascara on your top and bottom lashes and voila! Perfect wings.
Goodluck ladies! Xx